Robotic Preperitoneal eTEP Repair for Umbilical Hernia and Diastasis
Transcription
CHAPTER 1
Hello, I'd like to begin by thanking JOMI for inviting me to participate in this line of videos. My name is Hector Valenzuela, and I am a surgeon in Guadalajara, Mexico. I am the chief of abdominal wall reconstruction surgery in Hospital Angeles, and today I'm going to be presenting a case of preperitoneal eTEP, or eTEP preperitoneal. Regardless of the name, what this technique is about is an extraperitoneal access surgery that takes place mostly in the preperitoneal pretransversalis space. Preperitoneal eTEP is a surgical technique that we started performing almost three years ago. We have published our results in Surgical Endoscopy, and this technique is something that we have been using primarily for patients with mid-sized hernias within the midline that happen to occur in the context of diastasis, and we're using it in both male and female patients. Preperitoneal eTEP is a great alternative when you want to repair a hernia and you do not want to cut any fascia, any muscle, or perhaps enter the retrorectus space in clinical scenarios in which perhaps the hernia might seem to be undeserving of this sacrifice in the retrorectus space. Preperitoneal eTEP is a surgical technique that we usually do from a suprapubic approach, although our friends in Spain have described the cranial approach to peTEP. We usually place the first port in the midline, one centimeter above the pubis, and we perform a blunt telescopic dissection to develop what we will consider zone one of the dissection, and then allow us to place two accessory ports, one on the left and one on the side, two centimeters above and six to seven centimeters to the side, that will allow us to place our working arms when we're doing laparoscopic surgery, or dock the robot and work from the pelvis to the xiphoid process. The pros of preperitoneal eTEP would be preserving the retrorectus space and allowing us to perform a repair of midline hernias that may coexist with a diastasis recti, and that you don't have to cut any muscle or fascia to introduce a sublay mesh to reinforce the repair. The cons of this surgical procedure will be that the preperitoneal layer is a harder layer to develop, the peritoneum is very fragile, and in some patients might be unpredictable, and developing peritoneal tears is a constant issue that we have to deal with. The most common complications that we have during this surgery are precisely large peritoneal rents that sometimes may lead you to convert the surgery to either an eTEP Rives-Stoppa or a transabdominal preperitoneal repair. Indications for this procedure in our algorithm initially were for patients with primary ventral hernias, although recently we have been extending our indications for patients who have incisional hernias, or reoccurring small hernias within the midline. Some of the pitfalls, or downsides to this procedure is that this is not going to be very effective for patients who have hernias below the umbilicus because ergonomics will not allow you to do a repair in this anatomical area. Another of the possible difficulties while performing this procedure is that when you're standing in between the patient's legs, you're going to be having some collisions either with the robot or with your working arms when performing the surgery, and this is why many of the surgeons that have attempted this around the world have struggled in the beginning. Some of the alternatives to preperitoneal eTEP are eTEP Rives-Stoppa, of course, IPOM, and SCOLA. Although we believe preperitoneal eTEP in some clinical scenarios is superior to these techniques because it allows for the repair placing a sublay mesh through an extraperitoneal access, and repair both at the same time hernias and diastasis recti without entering the retrorectus space, or without having to place mesh either on the subcutaneous space, or in the intra-abdominal area. So, this patient comes from out of town. He's a physician. All his pre-op workup we've been doing through Zoom consultations. He spends a lot of time in the OR. He has an umbilical hernia, and he also has noticed in the recent months that he's developed a lot of pain in the lower back, especially after performing lengthy procedures, and he feels there's a relationship between this and his very wide rectus diastasis. The hernia, it's a 3-centimeter incarcerated umbilical hernia. And before he came to Guadalajara, we did a CT scan in which you will be able to see that there is a 6-centimeter diastasis, and the diastasis goes all the way from the xiphoid process until 3 centimeters below the umbilicus, and the shape of his abdomen is completely changed, and there's lack of containment because of this very large rectus muscle diastasis. We discussed very thoroughly the options, and we thought that he was a great candidate because there was no previous abdominal surgeries with him, and his primary hernia was small, and it's within the context of diastasis. He was a good candidate for preperitoneal eTEP. So, we did a full workup. I did inject Botox, 50 units on each side of the abdomen before the procedure because the diastasis is so wide that I wanted to decrease the tension that he's going to have in the postoperative period. So five weeks before the surgery, I injected him in five points on each side with 50 units of Botox. So, the surgery takes place with the patient in supine. His legs need to be in stirrups, spread apart. It is important that the thighs are slightly bent to the back because this is going to allow us to have a working space where the instruments, if it's laparoscopic, or the robotic arms are going to move freely while the procedure takes place. This procedure is performed with the optic port in the center. We do not need any special balloons to create the extraperitoneal access or initial dissection. And after we have created enough space, we're going to have in our right arm, a monopolar scissor device, and in our left hand, the bipolar. It's just a fenestrated bipolar device. And this is all that we need to do all the initial dissection. The dissection takes place in zones. Zone one will be from the pubis to the umbilicus. Zone two will be on top of the falciform ligament from the umbilicus to the xiphoid process. And zone three is going to be lateral to the falciform ligament, medial to the transversus abdominis muscle. And this area is usually the hardest area to dissect because this is where the peritoneum is going to be the more fragile, the more unpredictable, and the easier to have some tears and ruptures during the procedure. For this, instead of going from zone two to zone three, medial to lateral, what we're doing is we are entering the lateral prongs of the fatty trident and we are dissecting the pretransversalis space and coming from lateral to medial in the pretransversalis layer in order to communicate with the preperitoneal area on top of the falciform ligament.
CHAPTER 2
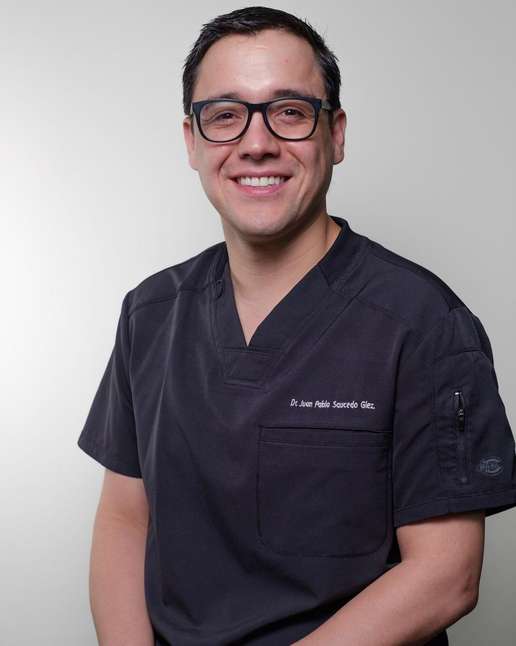
We're getting ready to start this case. Today we're doing a preperitoneal eTEP and in our team, we have Dr. Cristian Valenzuela who is my brother and is the best anesthesiologist in the block. I have Dr. Claudia, Dr. Scarlett, Dr. Alejandro, Dr. Juan Pablo Saucedo, and Dr. Francisco Regin. They are all, the three first are residents and the other two are my associates, and we will all be participating in this surgery. The first thing we do with the patient is do TAP blocks. I believe it is very important for pain management after the surgery. I see an important difference in the way the patients feel, and we're going to show you just how we do that. The patient is already prepped and what we have is a solution with 40 cc of - 40 cc of saline, 20 cc of lidocaine and epinephrine, and 20 cc of ropivacaine. The first thing, the first block we're going to do is the TAP block, and what we see over here in the lateral abdominal wall, is the external oblique, internal oblique, and deeper in the abdomen, the transversus abdominis muscle. So, the nerve branches that supply sensitivity to the abdominal wall come between the transversus abdominis and the internal oblique. This is why we are blocking the transversus abdominis plane. The needle has to come in exactly in the middle of the transducer, and we're going to observe how the needle advances in the muscles and when we get to the transversus abdominis we're going to feel a small click, and we are now in the transversus abdominis plane. We're going to see very nicely how a puddle of anesthesia is going to form between the internal oblique and the transversus abdominis, providing a great nerve block sensitivity to the lower part of the abdomen. But the branches from T10, T11, and T12 are going to come higher up and this is why I prefer doing a block in the posterior rectus sheath. So here we see the rectus abdominis, anterior rectus sheath, posterior rectus sheath, and the part of the transversus that becomes medial behind the rectus abdominis. And this is where the nerves are going to pass through and the correct area to do a block for these nerves. So... Right there. And we're going to do only 10 cc over here. And this way we have a blockage of the whole side, and now we're gonna do the contralateral side. Again, we see external oblique, internal oblique, and transversus abdominis. We go in perpendicular. We see the needle as it goes through. We reach the TA and once we feel a slight click right there, we do 20 cc. And we always do this before surgery, and I prefer doing it ultrasound-guided because this way I see exactly where the anesthesia is being deposited. When we're done, we move to the posterior rectus sheath on this side. Again, we see the rectus, lateral edge of the rectus abdominis muscle and the transversus abdominis right behind it. And we see the tip of the needle getting right there. So let's do 10 cc over there. Perfect. And at least in my patients, this provides wonderful pain control. And this is it as far as the blockages. Now we're going to prepare the patient and put him in the right position.
CHAPTER 3
Okay, so now we're going to set the patient in the right position. For this, we use the stirrups. The stirrups are an alternative, but we have also done this with the operating table that has the spread legs, and we just bend them to the back. I just find this more comfortable for this situation. So we need to make sure where the edge of the table is, and we're going to pull the patient down, until his buttocks is in the edge of the bed. It's important that the sacrum is in good contact with the cushion. Ready? Three, two, one. Okay, so I make sure here the buttocks is in the right place. Correct. And now we place the legs in the stirrups, making sure they are comfortable, they are not bent or anything. And we're going to drop the stirrups as low as we can. And this is going to provide us with this angle over here where most of the mobility will take place. We need this angle over here, and the legs need to be for this reason, a little with hyperextension, but the spine is aligned with the rest of the body, so my patients never complain of back pain or anything. And this is the way the patient is set up before surgery. And we do a mild rotation of the limb, medially, just to make sure that the thigh is not also in the way of the bed. And the arms can be spread out. And this is the way, the final setting of the patient looks like.
CHAPTER 4
All right, so the patient's nice and ready. It's all draped, and we're ready to start. The first thing is that we need to make sure where we're gonna do the first incision. So, we need to mark our bony structures. So, we want to know where are our ASIS. There's left patient ASIS, right patient ASIS, and the pubis is about here. And this is our midline. So, we want to be two centimeters above the pubis. So there you see two centimeters, and this is where our first incision will take place. We're going to use an eight-millimeter trocar. And I always like, despite already having done the TAP blocks, I like to use a little bit of local anesthesia, which is still from the batch of the first preparation that we did. So, we do an eight-millimeter incision. I try my surgical field to be as bloodless as possible, and we're gonna make a blunt dissection until we reach the anterior fascia, and we put the first S-retractor, and then we put the other S-retractor, what I think is Camper's fascia, there in the end. In the back, and we're gonna open gently the muscle. When we see fat, we're going to introduce the separator. So we're gonna... Just to make sure it's adequately seen, we're gonna show that we're actually in the fat right there. So you can see the preperitoneal fat. Yeah, right there, and the muscles nicely spread apart. So we don't have to do anything else. Bring in the port, separators out. We're gonna bring in the lens through the port and make sure that we're still in this nice preperitoneal plane. It's 12 mmHg. And then you see the areolar tissue forming very nicely in front of us, and we do this lateral motion movement, advancing very gently. At this point, I can't recognize any of the structures in front of me, but I know on top of me I have the muscle. Let me see. We're actually transversalis fascia, and here in the bottom what I am very sure is going to be the median umbilical ligament. So now we're with the 30-degree lens, and we're looking up. And I'm just gonna go back a little bit to show you the space that we've just created. Okay, so we allow the insufflation to work a little more. We're gonna work a little more towards our left side. You can see the space is developing very nicely. And we're gonna now develop a little more. On the right side. And I just ask for a little bit of hot water that I'm gonna use to clean the lenses a little bit. Solution? Let's clean the lens so we can get a nice view. And right now, our goal is just to create enough space so that I can enter my two other working ports, which will be... Two centimeters above the initial one, six centimeters to the right. So we're gonna look with the camera, and it's gonna be right about here on the left side, and right about here on the right side. And I think we've done enough dissection, but I am just going to make sure that I don't have to do this step again. Okay, so this is the midline. You can see the midline up there. And... Over here. So, Dr. Scarlett, take this lens for me, please. Let's dissect a little more in this side. And I'm always wondering about the epigastric vessels since I can't see them directly as when I enter through the retrorectus space. So that's the reason why I'm always using a bladeless trocars even when I do this laparoscopy, because I don't want to accidentally run a sharp edge through this through this port. So I think I've done enough dissection. Let me see the local, and I want to see the tip of my needle go in, and now I know where my port is going to come out. Dr. Scarlett is gonna hold this in the right place. Let me see the needle. I mean, the knife. Let's do an eight-millimeter incision to place our second port. Kelly. Now this port is in. Let's do the other side. Dr. Alex, take it. Local. Okay, so we need to get this a little bit off the way. Okay, let go for a moment. This needs to go a little bit further back. Local. Thank you. There we go. Yeah, right there. You can see the tip of the needle coming out right there. So let's do knife. Thank you. And now we have our ports in, and the rest of the work can take place through robotic surgery. So, now it's time to dock. Let's make sure nothing comes out, and let's dock.
CHAPTER 5
That's good. Okay. So this is the final looks of it, and we're ready to start. It's time for me to go to the console. All right.
CHAPTER 6
So, here we see what I think is the median umbilical ligament in the bottom. We have transversalis fascia on the top. I think we're in the right plane, but I do need to get down this excess fat. So in the beginning, it's normal to feel a little claustrophobic in this procedure. But as time progresses, the sensation goes away. There we go. So this is the right plane. So, what we wanting to do is just stay close to the transversalis fascia and follow it until you see it condenses and turns into the posterior rectus sheath. And we want to stay very close to the posterior rectus sheath. Juan Pablo? Okay. So... let's clean the lens now that we've gained a little more space. You can see here very nicely the transversalis fascia, how it condenses and becomes the posterior rectus sheath. So this way we know we are a hundred percent preperitoneal here, behind the transversalis fascia, one of the layers of the transversalis fascia. And what we're gonna do is just work to be close to the posterior rectus sheath. And this central part, what I would call the zone one of the dissection, which is coming from the pelvis, all the way up until we find the umbilicus, it's the easiest part of the surgery, but it's also the part when things can go wrong. This is the part where if you rush, if you do it quickly, you may have unintended early pneumoperitoneum. And this is not going to make surgery impossible, but it will for sure complicate things a little bit. It does happen to me all the time, and I'm hoping that today it doesn't happen. So we're gonna make very nice sharp cuts over here, and we're gonna stay close to the midline. And we wanna get all this fat and all this epimysium of the midline... Of the fascia, I'm sorry, because this is the better way to expose the fascia and make sure where the dissection is taking place. We're getting close to the umbilicus. And this is a fairly hemostatic dissection because there aren't any big blood vessels in this area at this moment of the surgery. When we advance further ahead in the abdomen, we are going to find some of the perforators around the umbilicus that will indeed provoke a little bit of bleeding as we dissect around them. A little bit of counter-traction. We're gonna go around. And I just show the plane that I wanna go, and the pneumoperitoneum will do part of the job for me because when I feel it's a little stuck, I just go like this, and then you see that the pneumoperitoneum continues to open the, the space and show me the way. It's just about being patient. Yeah. This part is very enjoyable. You can already see this guy has a very pathologic midline. He has a hernia defect over here, and you can see how the fascia is very loose. And when I apply pressure on it, or counter-traction on it, it loosens and inverts very easily. And this takes me to the indications of this procedure. We usually do this procedure for patients who have midline hernias above the umbilicus that may also have other pathologies of the midline, such as swiss cheese hernia defects like this one, patients with epigastric hernias and a rectus abdominis diastasis. And so far we have had more indications for this procedure as time progresses because now we're doing it for incisional hernias, we're doing it for reoccurring umbilical hernias, and we're just exploring the possibilities, just to prevent sacrificing the retrorectus space, probably in undeserving scenarios. Probably here is the umbilical hernia. We're getting close to it. You can already see how a pathologic linea alba this patient has. These are the perforators I was telling you about. And this is the bleeding I was telling you about. It's easily solved. This looks like it could be the median umbilical ligament or the urachus, but it looks like it's coming from lateral. So, it's more likely the patient's right median umbilical ligament, medial umbilical ligament. And we're gonna clean the camera once again. And this is going to sound very repetitive. But it's just about hugging the posterior rectus sheath and progressing through this plane. Important not to leave this fat here because we don't want any fat to be in between the fascia and the mesh. There we go. Here are some more of these perforators I was telling you about. These are the bigger culprit of bleeding in this procedure, so we just have to be mindful of them, and just make proper hemostasis when we find them. When I do this dissection, I'm always asking somebody in the surgical table to make sure that as I'm doing this, I'm not burning on the umbilical skin, and they do it very gently, so they don't disturb my surgical field. Then you see the umbilical ligaments. So they're just confirming that I'm far away from the skin, and we're about to dissect around the umbilical hernia defect. This is where I will get most of the peritoneal openings. It's not the end of the world, but I prefer not to have them. And let's work to reduce the contents of the hernia. I'm having a collision with my right arm. Great. Awesome. So now we just continue going, and we are transitioning from zone one to zone two of the dissection, which is above the umbilicus. And this guy's has very compliant fat. It's nice and thick to protect unintended entrance into the peritoneal cavity. Let's do the same thing over here. Let's take a moment to make our dissection a little wide. And let's continue. Juan Pablo? Apply gentle pressure, gentle pressure on this area so you decrease the angle, and I can avoid having a collision. Perfect. Perfect. Thank you. So, the reason why I asked him to apply gentle pressure is because this patient has a very compliant abdominal wall, and the pneumoperitoneum pushes the muscles and the fascia away from my surgical field, thus creating collisions outside in the surgical table of my instruments with the patient's legs. So, this is easily corrected by decreasing this angle, and that's why he presses very gently. but also being cognizant that if he presses too rough it's going to make my camera dirty, or compress my space too much. It's going very well. Okay. And just make sure we're close to the fascia. Nice and tight. Very pathologic linea alba. We have this perforator over here. Let's take care of it. And now we're dissecting in zone two. Let's change the angle to see if I can provide a better visibility. Yeah. Looks like it might be a little better for this part of the surgery like this. And I try to use energy as little as possible. If I don't have a big blood vessel to coagulate, I prefer to use just cold scissors because when we don't have pneumoperitoneum I'm always thinking that there might be bowel right underneath where my dissection is taking place. So, I don't want any of this energy to go into the abdominal cavity and create an injury, a bowel injury, unintended bowel injury in my patient. This patient is a doctor, by the way. He's a gynecologist. He is very happy that his video is going to be taking place in a platform where other surgeons can learn how to perform these procedures, hopefully. Yeah. Nice. And it's just about being patient, being meticulous, caring not to have lots of bleeding, not to enter the abdomen unintendedly. And zone two of the dissection is probably the one that we're more familiar with because those that do perform routinely eTEP Rives-Stoppa, this is the plane that we're used to dissecting, given that this is where we do the crossover. You can see the diastasis delineating over here. When I compare this to T-A-P-P, to TAPP, I think it's a more wholesome way of repairing the midline. Also, I think it provides a better exposure because, you're central, so you can see more symmetrical. Symmetry in my mind is very important. I don't know why. And also I think developing the preperitoneal space within the preperitoneal space coming from it and not from the abdominal cavity, it's a little better because the pneumoperitoneum is working for you and not against you. I think we're pretty high in the abdomen now. Juan Pablo, can you show me where the xiphoid process is? Another perforator. So we're close to the xiphoid process. Probably just... I'm just gonna go higher just a little bit to make sure that we've reached really the end part of the diastasis. And usually, the diastasis will become very narrow, but this guy has a huge diastasis, and he has here yet another small hernia defect. And this is another advantage of the preperitoneal eTEP that we can treat also hidden pathology of the midline. despite not being very symptomatic, I believe some of these hernias may grow in the future if they go untreated. And if you're going to do surgery in the preperitoneal space, might as well just make sure everything is nice and protected, or reinforced with mesh. Okay. Let's take a step back and see where we come from. So, let's clean the camera. Thank you. What is for us zone one of the dissection, which will be this triangle that I'm creating here. On top of here, you will see what is zone two of the dissection, which is on top of the falciform ligament all through the midline. And now we have to go to zone three of the dissection, which is what our friends from Madrid called the area of the desert, which is the space comprehended between the lateral prongs and the central prong of the fatty trident. So in the beginning, we used to try and go directly from here and just do a lateral dissection, which I think in this guy, due to his very nice peritoneum could be possible. But there are some patients whose preperitoneal fat is not as compliant, so we have to do other maneuvers to stay in the right plane. These maneuvers would consist of coming here early, before... There you can see... You can even see a loop of bowel in the back. So, what we do is we will go here and dig a cave in the pretransversalis space. Let me show you just how we do that. You can see how it's very nice, very nicely shown in this guy right here. You can see the peritoneum is super thin over here. But if you initially go lateral. And you come from the lateral prong to the central prong of the fatty trident, you're going to find it much easier because here we're reaching the pretransversalis space before the transversalis fascia actually fuses densely with the other contributions that form the posterior rectus sheath and that may be too condensative, making it difficult for the space to be created. I need to increase my exposure. So, what we wanna do is as if we were scraping off from the posterior rectus sheath, the transversalis fascia. And this is gradually going to open this nice plane for us, which for my surprise, is not as easy to see in this patient. But bear with me for a moment because as I get through this part, it's going to become more evident and easy. There we go. So far, so far it's okay. And you can see how, how here the peritoneum is, it's thick, more, more fused. But if you go from lateral, you're going to find a much easier plane to dissect. So this is why I always start here, start lateral, and then go back medial. Same principles as in TAR, the way Conrad and Yuri taught us. And you dig this cave, and you keep going and going, and allow the pneumoperitoneum or the CO2 pressure to do part of the job for you. It's just a matter of traction and counter-traction. Okay, so this area is really tough. This guy has a thin peritoneum. Thin, thin, thin peritoneum. So we just have to go very gradually, very slowly, and wait for the CO2 to show us the plane. Okay. And now we can start to connect the dots. The more we advance, especially when we get past the umbilical, umbilical scar, the easier this part of the surgery will be. There we go. Nice. You kinda have to follow where it shows you it wants, it wants to go. If, if you see the tissues are tearing or it's becoming too thin, probably it's a good place to stop, regroup, and choose another place to continue the dissection, just like we're doing right now. Like for example, this part, contrary to most cases, is resulting a lot easier when we do it close to the midline for some reason. And over here, the peritoneum is super thin, so I'm just gonna go over here and wait for a little while, while the pneumoperitoneum allows me to get in the right plane. Alejandro, Scarlet, Claudia, any questions? So, they're asking now about limits of the dissection. So, zone one is all the way up to the xiphoid on top of the... I mean, zone two on top of the falciform ligament, and zone three is on the lateral edge of the falciform ligament, but we never go beyond the transversus abdominis because these hernias never call for a dissection greater than that. These are usually pretty small hernias. Although this guy has a huge diastasis, but the hernias that we usually take care of with this technique are smaller. Let's change the view. Okay. As I said, as we get closer to the top, the dissection becomes easier because we are now in an area where there's thicker fat. And it allows for a quicker dissection. And in the end, this pays off because I don't have to spend a lot of time closing rents. I have bleeding over here, should be related to this vessel right here. Yeah. Don't be afraid to grasp the peritoneum. Just be very careful with the counter-traction, but I think it's necessary to show you the plane. If you do it gently, almost always it doesn't break. See? The pneumoperitoneum did the job over here. So this time, I didn't even see the transverse abdominis. All right. Looks like I have enough space for a good mesh. We will revisit that in a moment. Just a little bit of fat. All right. So again, going lateral and coming back medial, it's of the essence. Right here, if I go in through this orifice, I'm gonna be in the retrorectus space, so I don't wanna go there. I wanna go until I find the thick posterior rectus sheath, which is right here, and this is the space that I want to develop, right there. 'Cause this whole procedure is just so we can preserve the retrorectus space for more deserving hernia scenarios. Very gently, we're just gonna dig this cave, dig lateral as if we were scraping it off the posterior rectus sheath, and then allow the pneumoperitoneum to do part of the job. Work a little bit medial. And then just cut over here. And now repeat exactly what we just did. Are the screens looking okay? Turned out not to be the easiest case because the peritoneum is very frail, and I do have to go very slowly, but I'm glad that we're making progress. And this proves my point. That if you go lateral, see, it just opens up a lot easier. And as you're opening this, as you're opening this, the pneumoperitoneum is doing part of the job over here. I leave this towards the end, but I know that the CO2 pressure is helping me develop some of that, epimysium between the transversalis fascia and the peritoneum. Okay, let's go back a little bit. Okay, let's go over here. See, and when you see this, it's tempting to go and cut over here, but actually where you have to cut is here, because you want the peritoneum to be as whole as possible. Let's go. Let's go. Very nice. Very nice indeed. This side was a lot better now that I'm warmed up. Oh. Okay. Now I have to close this rent in the end. You can see how when you gain excess confidence, these little accidents can happen. It's no biggie. So this is actually good because now I can show you what I do with this. So if right now I see this rent, and I get angry, and I try to dissect on it because I want to amend my mistake, I'm gonna make it bigger. So, right now what I should do is completely forget about it and dissect elsewhere. So I'm gonna go here, and what I'm gonna do is I'm gonna loosen the peritoneum. And by loosening it, I'm going to release tension on the rent rim or its surroundings, making it less likely for me to make it bigger and worsen things. So now, I loosen this side. I'm loose over here. So I can go over here. That's it. This is something that 2-0 Vicryl can take care of. So my dissection usually stops when I see the TA, but I don't think we're ever gonna make it that far. Very nice cave. Super nice. Just making sure everything's nice and symmetrical. Oh, there you see. There's a TA right there. Right here. Okay. So, I'm gonna use a little bit of energy just because I have the fat right behind me, and it protects everything. And it's gonna make this part very pleasant to watch. So Juan Pablo, can you show me the xiphoid process, please? We're kinda close now. Yeah. Okay, now this looks like the fat around the xiphoid process, this right here. So, this is where I'm going to stop. And let's take a step back and look at the space that we just dissected. It's very nice and wide. We have large enough space to put nice size of mesh. And when you're doing incisionals or when you're doing reoccurrences, and you have big peritoneal rents, the peritoneum is super, super generous because it's so loose and abundant. If you do a nice enough dissection, you're gonna be able to close almost anything without having to do any fascia sacrifice. Okay, so let's, uh... How about we start closing? Just making holes. 2-0 Vicryl, please, and let's decrease the pressure to ten. So, here's the edge of the diastasis. You can see muscle here, and you have a muscle contraction, and then here, no muscle contraction. So in here, you have... All right. So, you can see how the diastasis becomes narrow here. Muscle fibers here, muscle fibers here, and the diastasis on the top. What's the pressure right now? Ten? Ten. Let's drop it to eight. The scissors aren't sharp anymore. So this one goes out and number one V-Loc comes in.
CHAPTER 7
Don't apply pressure here. Don't do it. Thank you. So for some cases, we do the Inan inverting plication, which will be a plication in which we will do a running mattress suture that will invert the excess fascia into the extraperitoneal space. In this guy, I already see the diastasis is so wide that I don't know I'm going to be successful with that. And my main goal is to restore, physiologically and anatomically his midline by reapproximating to the midline both anterior and posterior rectus sheath. And I feel that because of the width of the diastasis, I won't be able to provide that in the end with this repair or with that kind of closure. So, I'm just gonna go ahead and do the normal running suture, the closure that we generally perform for hernias. We'll see if in the end I have space to, to show you how the Inan inverting plication is. If not, you can always refer back to other videos we have in YouTube in which we show it all the time. We're probably gonna use three of these. Okay? Juan Pablo? Yes? We're probably going to use three of these. And now that we took most of the suture out of our visual line, we're gonna tighten it sequentially. So we distribute the pressure along the midline. Yeah, you can see this pathologic fascia over here. I have a collision on my right arm. It's usually the thigh. Okay. Can you, can you cut it? Cut the leg. You can see how after the closure, the space is becoming very narrow because now the muscles are together. So of course, this patient is going to have a subcutaneous ridge after the surgery. But we discussed this in the consultations prior to it, and I counseled him that it will be normal. Within a few weeks, it's going to disappear almost completely, and he's fine with it. All right. Coming close to the hernia. I'm actually gonna do the hernia with the newer one. Okay? Can you guys get it ready? And... Hold on, hold on. 'Cause the space now is super narrow. Okay. Okay, can we increase pressure to ten again? Let's do the needle driver. So right now, Juan Pablo Saucedo is applying a little bit of pressure on the outside just to decrease the steep angle that I'm doing the suture with, and this is resolving the issue of the external collision. If you see, we've had very little collisions. We haven't had that many at all. Okay, stop for a moment. Yeah. Thank you. So, we're gonna try and give him a belly button again. So we do throw the needle thread through it. But not just now. Not yet. Not yet. So just by closing his huge diastasis and his hernia, the space got super decreased. This is for us just to grasp an idea of how loose and floppy his abdomen was. Okay, so now let, let's do the hernia. So push the umbilicus. That's it. Okay. I'm gonna grab very superficial. Make sure the suture is not through the skin. Hold on one sec. Let me grab the needle again. Little bit of pressure. Thank you. Okay, so make sure the needle - the suture is not through the skin. No, it is not. All good. All right. Let's keep going. Yeah, so this part of the surgery is kinda tedious, but I assure you it's gonna be worth it in the end. Help. Turn the pressure back to twelve to see if I have some more working space, 'cause it's getting kinda tight. To make sure I don't accidentally lock my suture, you always need to go away from the loop. How far am I going to do the plication? Till the end of the diastasis, or until I run out of fascia at the arcuate line. Some people have asked me if I worry about bladder injuries upon my initial entrance. And honestly, I don't. I just ask my patients to urinate before the surgery, and it's usually okay. And I am very gentle when I'm doing the initial dissection, and I never do it towards the bladder. I always do it towards the front. So... I'm having a collision here, so I need the angle to be improved. Okay, so now I think... Yeah, that's it. That's my arcuate line. That's as far as I can go. You see? There's no more fascia underneath this, so there's nothing else to plicate. Otherwise, the stitches will be thrown only in muscle, and this is just gonna create pain. So right now, I'm just gonna circle back and reinforce the way I came in. But first, let's deal with this last thread of suture. Gonna suture back through that again. Can you please look at the umbilicus, make sure I didn't go through it? All good? Yes. Thank you. Can we please get a ruler ready? Cut it in half longitudinally. Let's take these out. Sutures come out, ruler comes in. Needle holder. Thank you.
CHAPTER 8
This has been bugging me. Yeah. Yeah. Okay. So all the way here. Right here, it'll be a fifteen. Yeah, so I guess we're gonna do... We're gonna do the whole thing. Okay? It's gonna be... Yeah. Twenty... Let's do twenty-eight by... Yeah, twenty-eight by fifteen. Okay? So Juan Pablo is gonna change the gloves as it is our practice to prevent hernia contamination. This is a medium-weight macroporous polypropylene mesh, as it is my preference for the vast majority of my ventral hernia cases. And right now, he's doing a perfect demonstration as to how we trim the mesh to make it fit nicely into the space that we just created. So while it's not mandatory to fix the mesh, I prefer lay it nice and flat against the fascia because if it adheres to the peritoneum I fear that it may have some kinks or twists, and the fascia is more solid and I think a better, more stable surface to fix.
CHAPTER 9
Okay, let's go here. Let's go here. I can already see we're gonna have to extend our dissection a little bit, but that's fine. You can tell this is one old scissor. Okay, we are gonna have to make this space a little wider. Maybe I'm gonna have to use the scissor later, okay? I know many of you are thinking this is a very complex procedure for very simple hernias, but it's not just about the small hernia defect. This is about the abdominal wall as a whole. And I think this surgery for patients with pathologic midlines provides a more wholesome repair. And also, I think this is a gateway procedure for - we can extend our indications for this surgery. I think we can do it on, on bigger hernias and more challenging scenarios and provide good results. Okay, so let's take a last look. I think we need to work a little bit over here with the mesh. Give me the scissor, please. So, that makes me happier.
CHAPTER 10
So now I'm scrubbing back in just to make a maneuver in which we're going to deal with the pneumoperitoneum.
CHAPTER 11
So what we're gonna do is we're just gonna make a small orifice in the peritoneum to insert the cannula. Gracias. So, we're gonna make a little hole over here, an intentional hole. But we do the hole behind this fat, so there's like a tunnel that will protect the cavity from contact with the mesh. And this is just to insert a cannula that will help me aspirate the excess, or the remaining pneumoperitoneum in the abdominal cavity. It's very, very tiny. Okay. I will bring in the cannula, suck the air out. And gradually lose the pneumoperitoneum. And that's it.
CHAPTER 12
So today, the two major challenges that we were presented with is that this patient didn't really have a very accessible pretransversalis area, and the peritoneum was very fragile. And developing zone three, especially in the left side, was a little bit more challenging. We did have to be very patient. We did have to allow the pneumoperitoneum to work a little bit for us in developing this space in order to maintain its integrity and maintain the peritoneal rents to the minimum possible. And the second very challenging thing is that this patient had a very wide diastasis, and we used a number one non-absorbable self-locking suture. And I think because we prehabilitated the patient with Botox, reapproximating the muscles to the midline wasn't very difficult. Also, key step for this procedure when we're trying to reapproximate wide diastasis or wide hernia defects, is to do several throws of the suture and then pull them and tie them gradually so the pressure is distributed or the tension is distributed along the whole line of the closure and not just in one specific area that can cause the fascia to have a lot of tension and break. So before the surgery, we admit the patients the same day that the surgery will be taking place. As I've already mentioned, this patient was prehabilitated with fifty units of Botox five weeks prior to the surgical procedure. We advise the patients to be on a high fiber, low flour diet, lots of liquids, so they are not constipated after the procedure, and they are allowed to exercise and maintain as active as they need prior to the procedure. This is an overnight procedure. Sometimes even can be an ambulatory procedure. And then the patients leave the hospital the following day. They do have a brace, not because I worry about reoccurrence, but because this makes them feel more comfortable and more reassured to restore in their activities. We allow them to do anything but lifting, bending, pushing, or pulling any heavy objects. We also prevent them from driving seven days just because heavy, heavy traffic or hectic driving may cause them to strain and have some discomfort. We advise them to lose the binder two to three weeks after the procedure, and they are allowed to start doing exercise, like aerobic exercise and very light weightlifting in machines where they can isolate muscle groups instead of having to do straining with the abdomen three weeks after the procedure. After eight weeks, they are able to resume a hundred percent their regular activities. So, patients do really well with this surgery. We ask them to give it a grade on the first day postoperative and on the seventh day postoperative when they come to our office for evaluation. And because the surgery takes place in an area where there are no neurovascular bundles, there are no nerve structures that you can injure, or manipulate too harshly and may induce pain. There are no big blood vessels, so they rarely - you rarely have any bleeding in the operative site. So, these patients really don't hurt a lot. Usually, they only take painkillers for three to four days after the surgery. These are NSAIDs. I never prescribe my patients any opioids. And I ask them to grade the surgery in terms of pain with the analog visual scale, and they usually give me as a scale of pain between two and three on day one, and they go to zero and one on day seven. So they really, really do wonderful. So, another thing that I have to talk about is what if it was me? What if the patient was me? What if I was a gentleman with a diastasis and a midline hernia? Would I do this surgery to myself? And the answer is an absolute yes. Why? Because I would prefer that my posterior rectus sheath is wholesome. I would prefer that nobody cuts my posterior rectus sheath, nobody dissects near my neurovascular bundles unless it is absolutely necessary. Also, I wouldn't want any intraperitoneal mesh in my abdomen. And more importantly so, I wouldn't want any subcutaneous mesh that will produce a seroma, especially because gentlemens, men patients do terrible with SCOLAs or subcutaneous surgery. So, I would definitely do to myself a preperitoneal eTEP because it allows for an anatomic and functional restoration of the midline, it allows for closure of the defect, and it allows for a sublay placement of a really good quality mesh. So as I've mentioned before, the biggest caveat to this procedure is the peritoneal rents. Peritoneal rents are very common, especially in the initial stage of your learning curve, and some of these peritoneal rents are going to be very wide and difficult to close. So when dealing with peritoneal rents, what I advise my colleagues is if you have a peritoneal rent, don't go directly to dissect it and try to correct your mistake, or close it immediately. When you have a peritoneal rent, you have to dissect around it, because what you want to do is loosen the peritoneum so you decrease the tension in the ring of the rent. And once you've dissected around it and you've regained your proper plane, then in the end, when the peritoneum is really nice and loose, you can perform a closure and make sure that your mesh is completely extraperitoneal. Another issue is when you perform the common closure, when you reapproximate the muscles and the excess fascia is going to bulge into the subcutaneous space, the patients are going to have a ridge, as it was in this case. So I really counseled my patient before the surgery, and I told him he was going to have this ridge. So when he wakes up, he's expecting to see it, and he knows that this ridge, within a few months, is going to go away completely. So, as long as you talk to your patient and you let him know what's gonna happen and you reassure him that this is going to be normal and it's gonna go away he's going to feel very, very comfortable. An alternative to this is the Inan inverting plication. The Inan inverting plication is a wonderful technique in which we do, a suture we suture the midline back together, but we do it on that running mattress fashion in which we invert into the extraperitoneal space the excess fascia, so it doesn't bulge into the subcutaneous space, and it doesn't create a ridge, and this provides a better aesthetic look of the abdomen. But it's very difficult to perform in patients who have diastasis larger than four centimeters, as it was this case, and this is why we decided not to do it today. So another very important thing are collisions of the surgeon's arms or the robotic arms with the patient limbs. So it is important to have them slightly opened and that you have enough room for your arms to move. In the initial part of the procedure, since you're going to be dissecting close to you, the angle in which your hands are going to be operating is a more open angle. Therefore, it's better if the legs of the patient are closer together, so you have room for your arms to move on the sides. And then later in the surgery, because your target is going to be further in the abdomen, your hands are going to be closer to your body and are gonna be closer together, so you can open the legs of the patient and work more comfortably in this area. Also, when we're doing laparoscopic surgery, I advise surgeons not to put their fingers inside of the instrument because this is going to limit the mobility of the wrist. I grab the instruments without putting my fingers inside of the instrument. And also, you can't hold them like this. We have to learn how to work with our hands as if we were riding a bike and use our fingers a lot to give rotation to the device. In terms of complications, so far we haven't had any complications that we have to reoperate, readmit a patient into the hospital. We have had to switch in two times into an eTEP Rives-Stoppa, or transabdominal preperitoneal repair because the integrity of the peritoneum was difficult to attain, and this was very early in our learning curve. We worry that the peritoneum and the transversalis fascia is so thin that the inflammatory reaction of the mesh integrating into the tissue may surpass this thin layer and be transmitted inside of the abdominal cavity, and perhaps develop adhesions. But since we haven't reoperated on any patient, we don't know if this is happening. The way we think about this is the same way it's in a TAPP, or for inguinal hernias, or for ventral hernias. It's still a preperitoneal mesh, and it should behave exactly the same way as it behaves in TAPP for inguinal, or ventral hernias. I wouldn't do preperitoneal eTEP in patients who have previous pelvic surgery. We have done it in some ladies with C-sections, but it does take a lot of time to develop the initial stage of the procedure. We always end up with a very large peritoneal rent in the scar of the C-section that we can later close in the case. But this is very difficult to maneuver, so I wouldn't advise a surgeon on his learning curve to do this very early. I wouldn't do this surgery in a patient who may benefit from component separation in order to be able to reapproximate the hernia defect. I wouldn't do this in patients who have had extensive intra-abdominal surgical procedures that may have lots of adhesions in the peritoneum because since you're working close to the peritoneum it's easier that you can injure a bowel. I also wouldn't do this surgery on patients who have larger hernias. I think for larger hernias, larger than six centimeters, for example, I think the retrorectus space is still the king of spaces. I am requested to speak about what's the future for a preperitoneal eTEP. So currently we started doing this in Guadalajara, Mexico three years ago, and currently this technique is being done in U.S., is being done in Latin America, is being done in Australia, is being done very, very well undertaken in India, and in many places in Europe. I have every week lots of friends and surgeons sending me videos or asking for advice on how to do this surgery. So I predict that this is going to be a procedure that, especially with the help of robotic platforms, is going to be very well undertaken. I think it will remain a valid alternative for patients with primary ventral hernias, either umbilical hernias, epigastric hernias, for small incisional hernias, or small reoccurring hernias within the context of diastasis. I think that this is going to be possibly a technique that will have a great indication in these clinical scenarios. So in terms of postoperative outcomes with this patient, we were able to see him before he went back to his hometown. We saw him actually three days after the surgery. By this time, the patient, doctor, mentioned he wasn't taking any painkillers. He had no pain virtually in his abdomen. Of course, when he went up and down stairs or when he reached for something, he remembered that surgery had taken place. But other than this, he was very comfortable. When we examined his abdomen, the ridge had already decreased about 50%, and we're very certain that within the next eight to 12 weeks it's going to go away completely. We are yet to evaluate what are the results in terms of the pain in the lower back, but we know for sure that his diastasis and the hernia are very well reinforced with a large piece of mesh and adequate closure and reapproximation of the midline. This was a good case to present because I myself was presented with lots of the challenges during the procedure that I am sure surgeons out there are going to struggle with. And I am just really hopeful that seeing me struggle is going to inspire you into becoming even better at dealing with these challenges in your own procedures.