Open Reduction and Internal Fixation of a Trimalleolar Ankle Fracture
Main Text
Ankle fractures are the second most common lower limb fractures after those involving the hip, accounting for 10% of all fractures, with an incidence that has been increasing.1,2 The goal of management is to restore a stable and congruent joint. Operative management is recommended for most displaced fractures, fractures with dislocations, and open fractures.
In this video, Dr. Weaver walks us through the surgical management of a 23-year-old male who sustained a trimalleolar ankle fracture with concomitant dislocation and syndesmotic injury following a motor vehicle collision. Dr. Weaver discusses the surgical landmarks and approaches to the ankle, the methods of fixing the malleoli and the syndesmosis, and common concerns that arise during the surgical management of ankle fractures.
Ankle fractures are among the most commonly encountered fractures in orthopedics; nevertheless, their frequency should not undermine their seriousness. Disregarding the precise details of these fractures can lead to disappointing outcomes. Because the joints in the lower limb act in concert during the gait cycle, any deviation from the normal function of one joint can have significant implications on the function of the other joints.
Low-energy trauma accounts for the majority of ankle fractures. Elderly women are especially susceptible to these injuries, reporting the highest incidence of ankle fractures, particularly bimalleolar and trimalleolar patterns.1,2 High-energy trauma can also result in ankle fractures, commonly with suprasyndesmotic patterns.3 Men are more likely to sustain ankle fractures at younger ages than are women.4
There are several risk factors for ankle fractures, including obesity, multiple falls, and alcohol consumption.4,5,6 The relationship between ankle fractures and osteoporosis is less clear; while some studies identified ankle fractures as osteoporotic, others failed to identify any significant relationship between bone mineral density measurements and such injuries.7,8,9,10
A previously healthy 23-year-old male presented to the emergency department (ED) complaining of severe right ankle pain, swelling, and deformity after being a restrained driver in a head-on motor vehicle collision. On arrival at the ED, he was conscious and alert with a Glasgow coma scale of 15. Apart from his ankle, the patient had no complaints. His vital signs were all within normal limits.
Initial evaluation followed the advanced trauma life support protocol. His airway and cervical spine, breathing, circulation, and neurologic status were all sequentially evaluated and cleared. The secondary survey was significant for a grossly deformed right ankle with medial skin tenting and bruising; however, no open wounds were identified. The right foot was pink with rapid capillary refill; however, the right pedal pulses were not palpable. Intact sensation was reported in both lower limbs; however muscle strength could not be assessed on the injured side because of pain. The patient received adequate analgesia, and ankle x-rays were obtained. He was found to have a trimalleolar ankle fracture with associated lateral dislocation. A reduction was successfully performed in the ED under conscious sedation and was stabilized temporarily using a well-padded posterior splint. Postreduction physical exam was notable for the return of the right pedal pulses.
The standard ankle trauma series is anteroposterior (AP), lateral, and mortise ankle views, although some authorities believe that obtaining only mortise and lateral views without an AP view is equally reliable.11,12,13 Ottawa ankle rules are a helpful decision-making guide to determine whether radiographs are needed.14 Nevertheless, these rules may not be reliable in patients with diabetes.15 Radiographs should be obtained whenever there is doubt as to the diagnosis. Foot or full-length leg radiographs are required if there is a clinical suspicion of associated foot or proximal leg fractures, such as the Maisonneuve fracture.
Plain radiographs not only provide information regarding bony injuries but also give valuable clues about concomitant ligamentous injuries and potential fracture instability. Many radiographic parameters are used to assess reductions and the presence of ligamentous disruptions, namely deltoid ligament and syndesmotic injuries. Nevertheless, these parameters should be interpreted with caution as their reliability differs according to various studies.
The tibiofibular clear space is the most reliable measurement to detect widening of the syndesmosis, because the other parameters may vary with ankle position or rotation.16 This space is defined as the horizontal distance between the lateral margin of the anterior tibia and the medial fibular cortex measured 1 cm above the tibial plafond. A width of less than 6 mm on both AP and mortise views signifies a normal syndesmosis. The tibiofibular overlap is the maximum horizontal distance between the medial cortex of the fibula and the lateral edge of the posterior tibial cortex. Normal measurements are more than 6 mm and 1 mm of overlap on AP and mortise views, respectively.17
Fibular fractures have varying propensities for associated syndesmotic injury. Although syndesmotic disruption has been classically associated with high pronation-type fibular fractures, the mechanism of injury and the fibular fracture level have proven to be inaccurate predictors.18,19 Furthermore, a medial clear space (measured from the lateral border of the medial malleolus to the medial border of the talus at the level of the talar dome) of more than 4 mm on mortise view correlates with deltoid and syndesmotic ligament injury.20,21 Overall, it should be emphasized that static images may not predict dynamic ankle instability and that “normal” measurements do not necessarily rule out ligamentous injuries.20 Therefore, stress radiographs such as gravity or manual external rotation x-rays may help uncover occult ligamentous injuries.
CT and MRI are not routinely needed in ankle fracture management. Nevertheless, CT scan is an indispensable tool in the preoperative planning of complex fracture patterns, in assessing the size of posterior malleolus fractures and syndesmotic reductions postoperatively.22 Ligamentous injuries and osteochondral lesions are best seen on MRI.
The ankle joint is a complex hinge joint. It links the foot to the rest of the body during gait and transmits the weight of the whole body through a small surface area. It is more efficient in load transmission per surface area than the hip or knee joints while at the same time being less commonly affected by degeneration and arthrosis. The optimal function of the ankle depends on its exact anatomic congruency, and any deviation from its normal anatomy, even as small as 1 mm, can significantly affect its function, leading to chronic pain, instability, and arthrosis.23
Ankle fractures are managed either conservatively or operatively, depending on the fracture pattern and associated soft tissue injuries. Non-operative management is indicated for stable ankle injuries, which include minimal displacement, i.e. 2–3 mm displacement, isolated medial or lateral malleolus fractures and isolated ligamentous injuries.24,25 Below-knee walking casts, air casts and ankle braces all give comparable results.26,27 The management of isolated ligamentous disruptions follows that of ankle sprains.
Ankle-spanning external fixation is mainly used to obtain preliminary fracture reduction and fixation in cases complicated by excessive skin swelling, blistering, or infection that prohibits early internal fixation. Rarely, external fixation is employed as a definitive treatment method.
Unstable fibular fractures are often fixed by plating. Both lateral neutralization plates and posterior antiglide constructs have been used with similar clinical outcomes, despite being biomechanically different.28,29 While posterior plating mitigates the soft tissue complications of lateral plating, it causes more peroneal tendon irritation.30 Bridging plates are recommended in cases of fracture comminution, a common occurrence in pronation-type injuries and osteoporotic fractures. Depending on the fibular fracture pattern, lag screws alone, tension band wiring, or intramedullary devices can also be used.
Based on the fracture morphology, unstable or displaced medial malleolus fractures can be fixed using lag screws, tension band wiring, or buttress plating, each with its unique advantages and drawbacks. Similarly, lag screws and posterior buttress plating are the principal methods for posterior malleolus fixation.
There are a variety of surgical treatment options for syndesmotic disruptions. Screws of various types, numbers, and function, sutures, and staples have been used to stabilize the syndesmosis.31 Infrequently, primary ankle arthrodesis may be required in patients with low functional demands or unsalvageable bone loss.32
Ankle fracture management aims to obtain a congruent ankle mortise that remains stable throughout the healing process and allows early mobilization. Any treatment strategy, operative or non-operative, that fulfills these requirements, will ensure a favorable outcome. On the other hand, because of its small surface area, the tibiotalar joint can tolerate incongruity exceptionally poorly.
The ankle is composed of a ring with the talus placed in its center. The talus is secured in the mortise by a ring of osteoligamentous structures and the tendons crossing the joint. The static joint stabilizers are the medial and lateral osteoligamentous complexes and the syndesmosis. A break in the ring, either bony or ligamentous, at one site will not affect talar stability. The fact that several studies have shown good outcomes after nonoperative management of isolated medial or lateral malleolus fractures supports this notion.25,33
Injury of more than one static stabilizer, as in bimalleolar or trimalleolar fractures, can lead to abnormal talar motion, instability, and loss of congruency. In such cases, the talus remains faithfully attached to the fibula, adopting its external rotation and posterior and lateral displacements.34 Concerns surrounding the posterior malleolus arise from the controversial role it plays in resisting posterior talar translation and maintaining the joint contact area and pressure.
Ankle fractures in elderly and osteoporotic patients need special consideration, especially when deciding if and how to operate. If a decision for surgical fixation was made, the poor bone quality should be taken into account preoperatively. Locking plates, intramedullary devices, tension band constructs, or tibiofibular trans-fixation are all measures the can partially circumvent this issue.
Another subpopulation of patients that require special consideration is the diabetics. Besides the poor bone quality, these patients also suffer from numerous soft tissue complications and generally need more restricted postoperative rehabilitation schemes.
In the early post-fracture period, the skin should be assessed, because it is the principal factor in determining the timing of surgery. If only mild swelling is present, open reduction and internal fixation (ORIF) can be carried out safely, as most of the swelling in this period is due to fracture hematoma, not tissue edema. Because abrasions often become colonized within 12–24 hours of injury, ankles with abrasions, no matter how insignificant, may benefit from early ORIF. Otherwise, open surgery should be delayed until the abrasion has healed. Similarly, open fractures should undergo debridement, fixation, and soft tissue coverage as soon as possible, unless there is extensive soft tissue damage. In such cases, it is better to apply external fixation until the soft tissue problems have resolved. Delayed ORIF is advisable when safe surgical exposures cannot be performed because of excessive swelling and blisters. An anatomic reduction is possible within two weeks of injury; however, it becomes increasingly difficult subsequently.35 Some studies found that early ORIF has at least equivalent outcomes as delayed fixation and recommended fixation within 24 hours of injury, 36,37 while others considered delaying ORIF more than seven days to be a poor prognostic factor.38,39
The decision of where to start is, first and foremost, a matter of surgeon preference. Most surgeons start by reducing and fixing the fibula. This restores the general shape of the ankle mortise, aids in subsequent reductions of the posterior and medial malleoli, and achieves the task of syndesmotic reduction. Nonetheless, this is not the case every time. Occasionally, failure to obtain an acceptable fibular reduction signifies soft tissue interposition in the medial malleolus fracture. As a result, reducing the medial fracture first may facilitate fibular reduction. Furthermore, many prefer to deal with the medial malleolus first in cases complicated by medial joint impaction, a characteristic finding in supination-adduction injuries. Fibular comminution is also one of the indications to proceed with medial malleolus fixation initially.
Controversy does not end at the posterior malleolus. While some believe that fibular fixation assists in reducing the posterior malleolus fracture, others suggest that the radiographic assessment of the posterior malleolus reduction is significantly impaired by medial or lateral hardware, and prefer to address the posterior injury first. Furthermore, reducing the posterior malleolus early during surgery helps to reconstruct the incisura fibularis that in turn facilitates subsequent syndesmotic reductions.
The operation is performed in the supine position on a radiolucent table. A bump is placed under the ipsilateral hip to prevent gravity-induced external rotation of the limb. The C-arm comes from the side of the normal leg. Placing the leg on a raised platform facilitates lateral imaging. A tourniquet is often used.
The skin is incised longitudinally following the posterior border of the fibula. Extending the incision for 1–2 cm distally and slightly anteriorly to the fibular tip allows easier retraction of the skin flaps and better visualization of the syndesmosis and lateral joint space. If an anteromedial approach is going to be used to address the medial malleolus fracture, the lateral incision should be taken more posteriorly.
The incision is carried sharply through the subcutaneous fat until reaching the deep fascia of the leg. Care should be taken in the proximal part of the incision as the superficial peroneal nerve traverses the deep fascia about 7–10 cm from the tip of the fibula.40 The deep fascia is opened sharply to expose the fracture site. Soft tissue dissection around the fibula should be limited to the extent necessary to expose the fracture and place the plate. The periosteum is retracted 1–2 mm from the fracture edges to allow reduction, and the fracture site is debrided to remove clots and small bone fragments.
The reduction can be achieved and held by manipulating the fracture fragments using a pointer forceps or a lobster-claw reduction clamp. If unsuccessful, a second pointer forceps can be used to apply traction on the distal fibular metaphysis. Care should be taken not to fracture the distal fibula, especially in osteoporotic fractures.
The reduction is then confirmed, both visually and under fluoroscopy, to ensure that acceptable length and rotation have been restored. Four radiographic findings are used to judge the fibular reduction. First, the talocrural angle, on the mortise view, is between a line connecting the tips of both malleoli and a line perpendicular to the tibial plafond. Angles of 83 ± 4 degrees are considered acceptable. Second, the “dime sign” describes a continuous curve that connects the groove on the distal tip of the fibula and the lateral process of the talus. A broken curve indicates a shortened and malreduced fibula. Third, the sclerotic line representing the subchondral bone of the fibula should be confluent and continuous with the sclerotic line representing the subchondral bone of the tibia on a mortise view. It resembles the Shenton line of the hip. A break in this line is due to a malreduced fibula or syndesmosis. Fourth, lateral talar tilt or shift leading to loss of parallelism of the talus within the ankle mortise occurs when the fibula is malreduced, because the talus follows the fibula wherever it goes. Finally, It should be borne in mind that fibular malreduction means syndesmotic malreduction.
If an anatomic reduction is achieved, one or two lag screws are placed 1 cm apart and as perpendicular as possible to the fracture line, depending on the fracture configuration. Usually, a 3.5-mm cortical screw is needed. The near cortex is overdrilled using a 3.5-mm drill bit. This is followed by drilling the far cortex using a 2.5-mm drill bit and a centering guide. Countersinking, measuring length, tapping, and screw placement follow, in that order.
If bone loss prevents anatomic reduction, plating alone will suffice. A 3.5-mm one-third tubular plate is often used. Infrequently, dynamic compression plates are utilized. A plate of a length that allows placing three screws proximal to the fracture and 2–3 screws distally is suitable. The plate is then applied to the bone after minimal contouring. If the plate has a locking option, the guiding towers are better being locked in place during contouring to prevent distortion of the screw holes. The plate is fixed initially using K-wires, and its position is checked under fluoroscopy.
Because conventional screws press and contour the plate to the bone, they are always placed before the locking screws. The proximal screws are inserted through both cortices whereas some distal screws are inserted through the near cortex only to prevent intra-articular placement. Making a triangular configuration with the unicortical distal screws ensures better purchase if conventional screws are used. Meanwhile, unicortical locking screws can be placed distally without any modification.
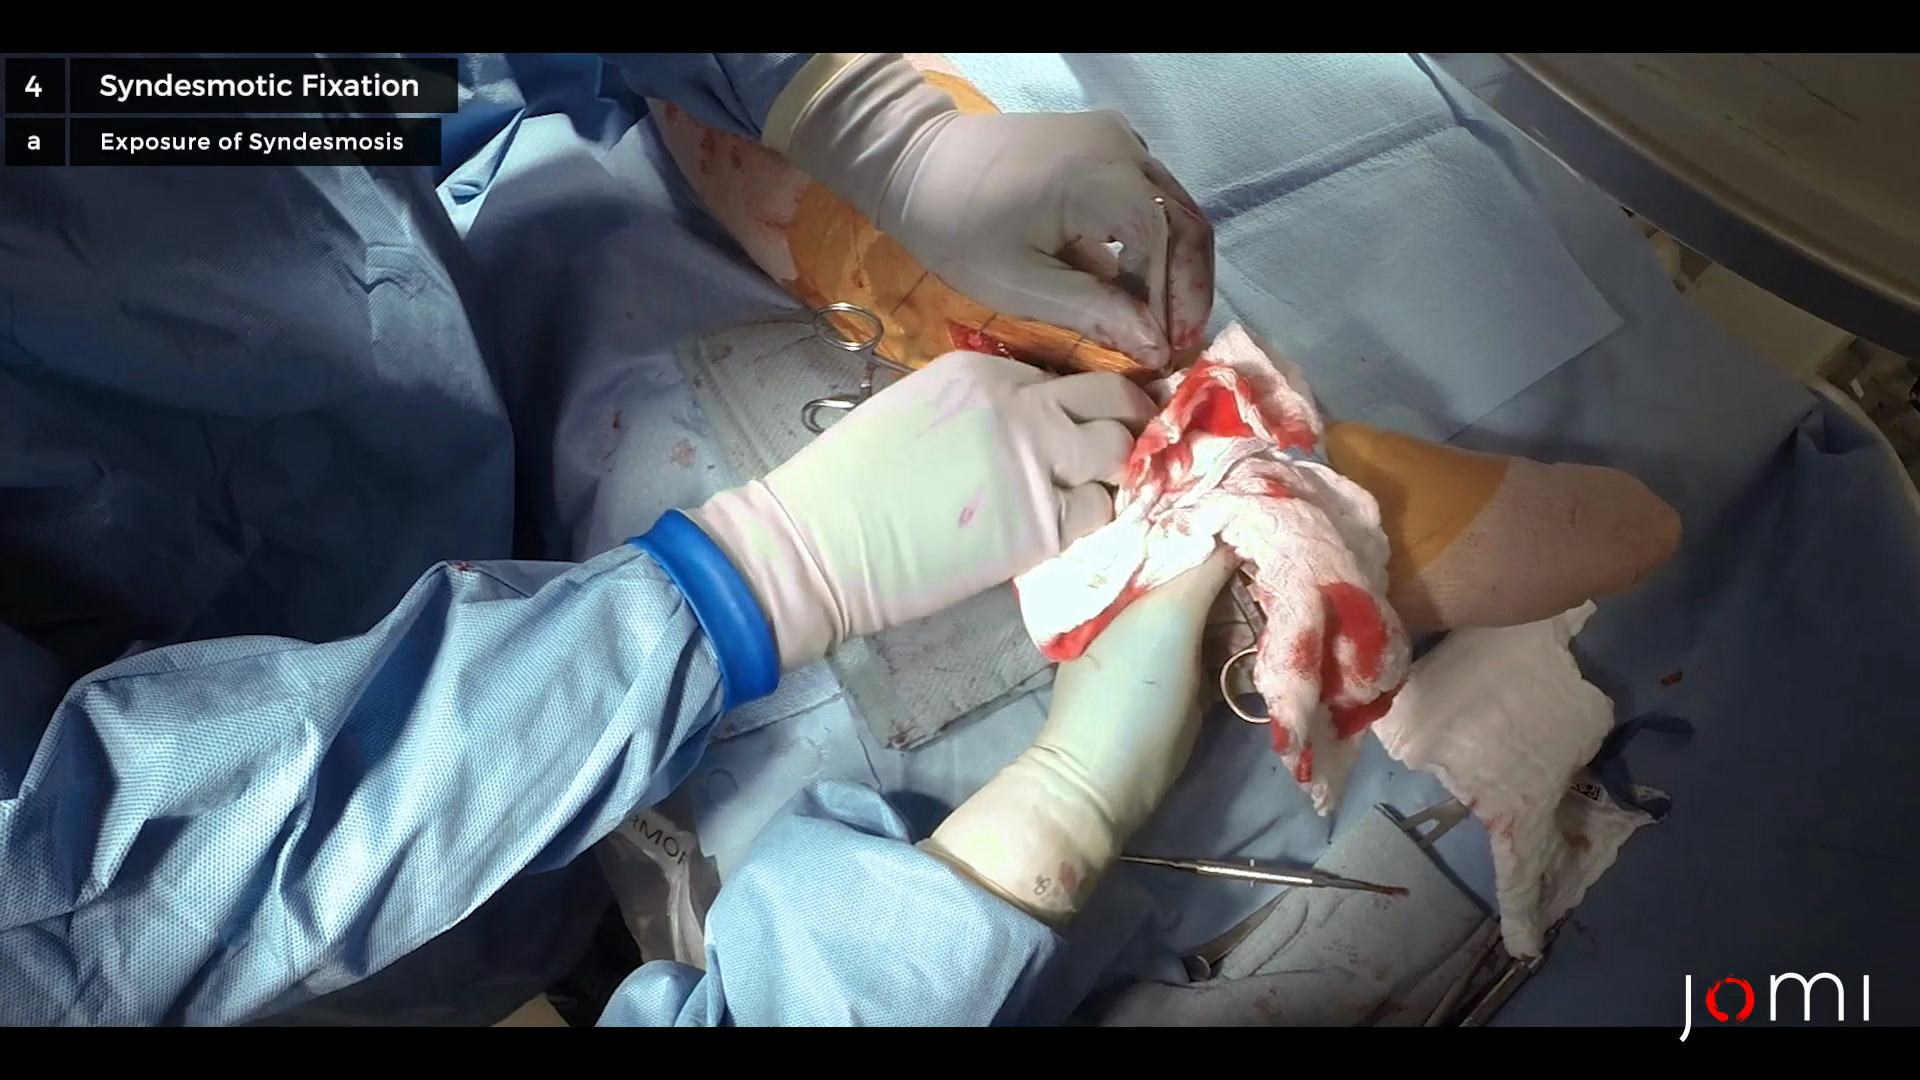
The integrity of the syndesmosis is checked using the Cotton or hook test in which a bone hook is used to pull the fixed fibula laterally.41 Widening of the tibiofibular and medial clear spaces are positive findings. Reduction of the syndesmosis can be achieved either percutaneously or using an open technique. A large articular reduction clamp does the percutaneous reduction. However, the vector of the clamp should be judged carefully, because an erroneous placement is one of the causes of malreduction.42 Placing the clamp in the anatomic axis of the ankle at the level of the syndesmosis with the medial clamp tine on the anterior third of the medial tibia can reduce the risk of malreduction.43
Nevertheless, many surgeons prefer an open reduction, because it permits confirmation of syndesmotic alignment. The syndesmosis is exposed through the same approach that was used to address the fibula. Compression of the syndesmosis is accomplished manually or using a reduction clamp and initially stabilization using K-wires. The traditional orthopedic teaching described the syndesmotic screw as a fully-threaded positional screw placed 2–3 cm above and parallel to the joint line. It starts on the fibula and is directed 30° anteromedially towards the tibia. The number, type, size, and length of the screw(s), and the position of the foot during insertion are all controversial and rely on the surgeon’s preference. Finally, the alignment of the syndesmosis is checked clinically and radiographically. Because the fibula is mostly unstable in the AP direction, a lateral x-ray should be included to confirm that the distal third of the tibia completely overlaps the fibula.44
An anteromedial approach exposes the medial malleolus. After debriding the clots and periosteum from the fracture, the talar dome is inspected through either the fracture gap or using a medial arthrotomy to rule out osteochondral damage. The fracture is then reduced using a reduction clamp and is fixed using two cancellous lag screws placed perpendicular to the fracture line. Partially threaded unicortical screws provide adequate fixation in patients with good bone quality. Nevertheless, placing fully threaded lag screws with purchase in the lateral tibia cortex is biomechanically superior to partially threaded lag screws.45 The reduction and screw position are confirmed radiographically with more emphasis placed on the AP view findings rather than the mortise view.46
The authors have no financial interests or conflict of interest to disclose.
The patient referred to in this video article has given their informed consent to be filmed and is aware that information and images will be published online.
Citations
- Court-Brown CM, Caesar B. Epidemiology of adult fractures: a review. Injury. 2006; 37(8):691-697. doi:10.1016/j.injury.2006.04.130.
- Bengnér U, Johnell O, Redlund-Johnell I. Epidemiology of ankle fracture 1950 and 1980. Increasing incidence in elderly women. Acta Orthop Scand. 1986; 57(1):35-37. doi:10.3109/17453678608993211.
- Court-Brown CM, McBirnie J, Wilson G. Adult ankle fractures - an increasing problem? Acta Orthop Scand. 1998; 69(1):43-47. doi:10.3109/17453679809002355.
- Jensen SL, Andresen BK, Mencke S, Neilsen PT. Epidemiology of ankle fractures. A prospective population-based study of 212 cases in Aalborg, Denmark. Acta Orthop Scand. 1998; 69(1):48-50. doi:10.3109/17453679809002356.
- Compston JE, Watts NB, Chapurlat R, et al. Obesity is not protective against fracture in postmenopausal women: GLOW. Am J Med. 2011; 124(11):1943-1050. doi:10.1016/j.amjmed.2011.06.013.
- Spaine LA, Bollen SR. ‘The bigger they come…’: the relationship between body mass index and severity of ankle fractures. Injury. 1996; 27(10):687-689. doi:10.1016/s0020-1383(96)00136-2.
- Seeley DG, Browner WS, Nevitt MC, Genant HK, Scott JC, Cummings SR. Which fractures are associated with low appendicular bone mass in elderly women? The Study of Osteoporotic Fractures Research Group. Ann Intern Med. 1991 Dec 1;115(11):837-42. doi:10.7326/0003-4819-115-11-837.
- Hasselman CT, Vogt MT, Stone KL, Cauley JA, Conti SF. Foot and ankle fractures in elderly white women. Incidence and risk factors. J Bone Joint Surg Am. 2003 May;85(5):820-4. doi:10.2106/00004623-200305000-00008.
- Stein EM, Liu XS, Nickolas TL, et al. Abnormal microarchitecture and stiffness in postmenopausal women with ankle fractures. J Clin Endocrinol Metab. 2011 Jul;96(7):2041-8. doi:10.1210/jc.2011-0309.
- Lee DO, Kim JH, Yoo BC, Yoo JH. Is osteoporosis a risk factor for ankle fracture?: Comparison of bone mineral density between ankle fracture and control groups. Osteoporos Sarcopenia. 2017 Dec;3(4):192-194. doi:10.1016/j.afos.2017.11.005.
- Brage ME, Rockett M, Vraney R, Anderson R, Toledano A. Ankle fracture classification: a comparison of reliability of three X-ray views versus two. Foot Ankle Int. 1998 Aug;19(8):555-62. doi:10.1177/107110079801900809.
- Vangsness CT Jr, Carter V, Hunt T, Kerr R, Newton E. Radiographic diagnosis of ankle fractures: are three views necessary? Foot Ankle Int. 1994 Apr;15(4):172-4. doi:10.1177/107110079401500403.
- Musgrave DJ, Fankhauser RA. Intraoperative radiographic assessment of ankle fractures. Clin Orthop Relat Res. 1998 Jun;(351):186-90.
- Stiell IG, Greenberg GH, McKnight RD, Nair RC, McDowell I, Worthington JR. A study to develop clinical decision rules for the use of radiography in acute ankle injuries. Ann Emerg Med. 1992 Apr;21(4):384-90. doi:10.1016/s0196-0644(05)82656-3.
- Coll AP. Ottawa rules, OK? Rules are different in diabetes. BMJ. 2009 Sep 1;339:b3507. doi:10.1136/bmj.b3507.
- Pneumaticos SG, Noble PC, Chatziioannou SN, Trevino SG. The effects of rotation on radiographic evaluation of the tibiofibular syndesmosis. Foot Ankle Int. 2002 Feb;23(2):107-11. doi:10.1177/107110070202300205.
- Harper MC, Keller TS. A radiographic evaluation of the tibiofibular syndesmosis. Foot Ankle. 1989; 10(3): 156-160. doi:10.1177/107110078901000308.
- Stark E, Tornetta P 3rd, Creevy WR. Syndesmotic instability in Weber B ankle fractures: a clinical evaluation. J Orthop Trauma. 2007 Oct;21(9):643-6. doi:10.1097/BOT.0b013e318157a63a.
- Nielson JH, Sallis JG, Potter HG, Helfet DL, Lorich DG. Correlation of interosseous membrane tears to the level of the fibular fracture. J Orthop Trauma. 2004 Feb;18(2):68-74. doi:10.1097/00005131-200402000-00002.
- Nielson JH, Gardner MJ, Peterson MG, et al. Radiographic measurements do not predict syndesmotic injury in ankle fractures: an MRI study. Clin Orthop Relat Res. 2005;436:216-221. doi:10.1097/01.blo.0000161090.86162.19.
- Park SS, Kubiak EN, Egol KA, Kummer F, Koval KJ. Stress radiographs after ankle fracture: the effect of ankle position and deltoid ligament status on medial clear space measurements. J Orthop Trauma. 2006 Jan;20(1):11-8. doi:10.1097/01.bot.0000189591.40267.09.
- Haraguchi N, Haruyama H, Toga H, Kato F. Pathoanatomy of posterior malleolar fractures of the ankle. J Bone Joint Surg Am. 2006 May;88(5):1085-92. doi:10.2106/JBJS.E.00856.
- Ramsey PL, Hamilton W. Changes in tibiotalar area of contact caused by lateral talar shift. J Bone Joint Surg Am. 1976; 58(3):356-357.
- Bauer M, Bergström B, Hemborg A, Sandegård J. Malleolar fractures: nonoperative versus operative treatment. A controlled study. Clin Orthop Relat Res. 1985 Oct;(199):17-27.
- Herscovici D Jr, Scaduto JM, Infante A. Conservative treatment of isolated fractures of the medial malleolus. J Bone Joint Surg Br. 2007 Jan;89(1):89-93. doi:10.1302/0301-620X.89B1.18349.
- Brink O, Staunstrup H, Sommer J. Stable lateral malleolar fractures treated with aircast ankle brace and DonJoy R.O.M. - Walker brace: a prospective randomized study. Foot Ankle Int. 1996; 17(11):679-684. doi:10.1177/107110079601701106.
- Stuart PR, Brumby C, Smith SR. Comparative study of functional bracing and plaster cast treatment of stable lateral malleolar fractures. Injury. 1989;20(6):323-326. doi:10.1016/0020-1383(89)90003-x.
- Lamontagne J, Blachut PA, Broekhuyse HM, O'Brien PJ, Meek RN. Surgical treatment of a displaced lateral malleolus fracture: the antiglide technique versus lateral plate fixation. J Orthop Trauma. 2002 Aug;16(7):498-502. doi:10.1097/00005131-200208000-00008.
- Kilian M, Csörgö P, Vajczikova S, Luha J, Zamborsky R. Antiglide versus lateral plate fixation for Danis-Weber type B malleolar fractures caused by supination-external rotation injury. J Clin Orthop Trauma. 2017 Oct-Dec;8(4):327-331. doi:10.1016/j.jcot.2017.06.005.
- Weber M, Krause F. Peroneal tendon lesions caused by antiglide plates used for fixation of lateral malleolar fractures: the effect of plate and screw position. Foot Ankle Int. 2005; 26(4):281-285. doi:10.1177/107110070502600403.
- Bava E, Charlton T, Thordarson D. Ankle fracture syndesmosis fixation and management: the current practice of orthopedic surgeons. Am J Orthop (Belle Mead NJ). 2010; 39(5):242-246.
- Stiehl JB, Dollinger B. Primary ankle arthrodesis in trauma: report of three cases. J Orthop Trauma.1988; 2(4):277–283. doi:10.1097/00005131-198802040-00003.
- Bauer M, Jonsson K, Nilsson B. Thirty-year follow-up of ankle fractures. Acta Orthop Scand. 1985; 56(2):103-106. doi:10.3109/17453678508994329.
- Yablon IG, Heller FG, Shouse L. The key role of the lateral malleolus in displaced fractures of the ankle. J Bone Joint Surg Am. 1977; 59(2):169-173.
- Fogel GR, Morrey BF. Delayed open reduction and fixation of ankle fractures. Clin Orthop Relat Res. 1987; (215):187-195.
- Konrath G, Karges D, Watson JT, Moed BR, Cramer K. Early versus delayed treatment of severe ankle fractures: a comparison of results. J Orthop Trauma. 1995;9(5):377-80. doi:10.1097/00005131-199505000-00003.
- Singh RA, Trickett R, Hodgson P. Early versus late surgery for closed ankle fractures. J Orthop Surg (Hong Kong). 2015; 23(3):341-344. doi:10.1177/230949901502300317.
- Høiness P1, Strømsøe K. The influence of the timing of surgery on soft tissue complications and hospital stay. A review of 84 closed ankle fractures. Ann Chir Gynaecol. 2000; 89(1):6-9.
- Mont MA, Sedlin ED, Weiner LS, Miller AR. Postoperative radiographs as predictors of clinical outcome in unstable ankle fractures. J Orthop Trauma. 1992;6(3):352-7. doi:10.1097/00005131-199209000-00014.
- Huene DB, Bunnell WP. Operative anatomy of nerves encountered in the lateral approach to the distal part of the fibula. J Bone Joint Surg Am. 1995; 77(7):1021-1024. doi:10.2106/00004623-199507000-00007.
- Cotton FJ. Fractures and joint dislocations. Philadelphia, PA: WB Saunders; 1910. 549.
- Phisitkul P, Ebinger T, Goetz J, Vaseenon T, Marsh JL. Forceps reduction of the syndesmosis in rotational ankle fractures: a cadaveric study. J Bone Joint Surg Am. 2012 Dec 19;94(24):2256-61. doi:10.2106/JBJS.K.01726.
- Cosgrove CT, Putnam SM, Cherney SM, et al. Medial clamp tine positioning affects ankle syndesmosis malreduction. J Orthop Trauma. 2017; 31(8):440-446. doi:10.1097/BOT.0000000000000882.
- Candal-Couto JJ, Burrow D, Bromage S, Briggs PJ. Instability of the tibio-fibular syndesmosis: have we been pulling in the wrong direction? Injury. 2004 Aug;35(8):814-8. doi:10.1016/j.injury.2003.10.013.
- Ricci WM, Tornetta P, Borrelli J Jr. Lag screw fixation of medial malleolar fractures: a biomechanical, radiographic, and clinical comparison of unicortical partially threaded lag screws and bicortical fully threaded lag screws. J Orthop Trauma. 2012; 26(10):602-606. doi:10.1097/BOT.0b013e3182404512.
- Gourineni PV, Knuth AE, Nuber GF. Radiographic evaluation of the position of the implants in the medial malleolus in relation to the ankle joint: anteroposterior compared with mortise radiographs. J Bone Joint Surg Am. 1999; 81(3):364–369. doi:10.2106/00004623-199903000-00008.
Cite this article
Weaver MJ. Open reduction and internal fixation of a trimalleolar ankle fracture. J Med Insight. 2023;2023(22). doi:10.24296/jomi/22.